Map
The map in the editor shows all sections of a volume. The location maps of a series show the world in which the book is set.
The name Map stands for two different things in the Spielbuchschmiede. The map in the editor is your overview of the sections of a volume. The location maps on the Maps tab of a series are maps of a region or town plans that can go into the book.
The map in the editor
Every box is a section. Symbols in front of the title show the type:
- ▶ is the start.
- ⚔ is a combat.
- ★ is a good ending.
- ✕ is a bad ending.
After the title there is ▣ if the section has an image. Three dots after the title show that the section has no text yet. After validation a red frame marks a section with an error.
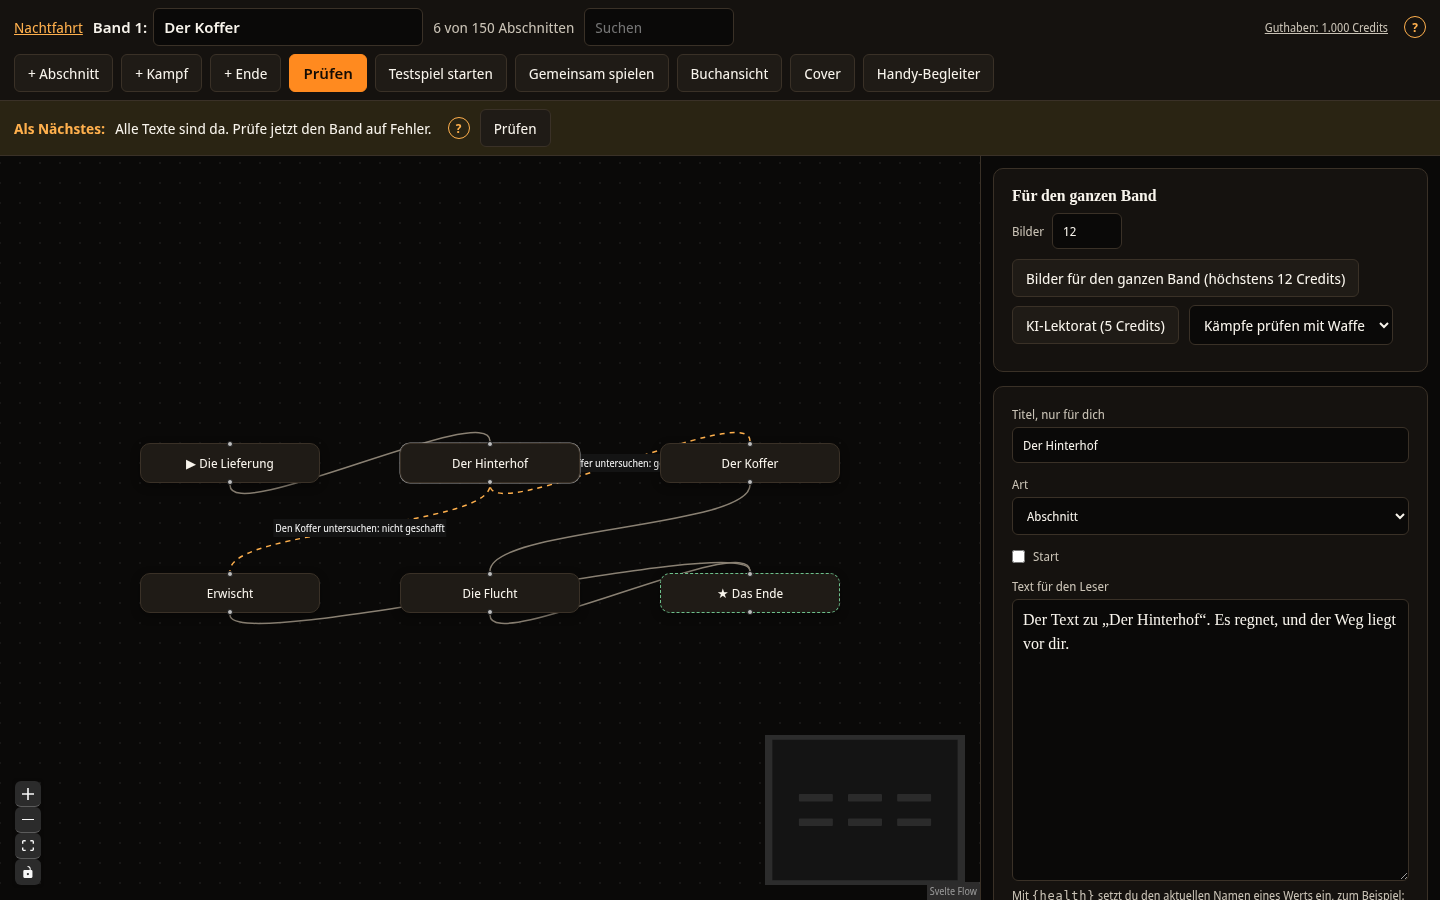
This is how you work with the map:
- Open a section: Click a box. The section opens on the right. Clicking the empty area closes it again.
- Move a section: Drag the box to another place. The new position stays saved.
- Create a choice: Drag from the bottom point of a box to the top point of another. This is described in more detail under Sections and choices.
- Change the view: The buttons at the bottom left zoom in, zoom out and fit the view to all sections. The overview at the bottom right shows the whole volume.
- Read choices: If you have selected a section, the text of the choices appears on its connections.
On a narrow screen the overview at the bottom right is hidden.
If the map seems too small, select the button for fitting the view at the bottom left. Then all sections fit into the picture.
Location maps of a series
With location maps you show your reader where the story is set. You create them on the Maps tab of a series.
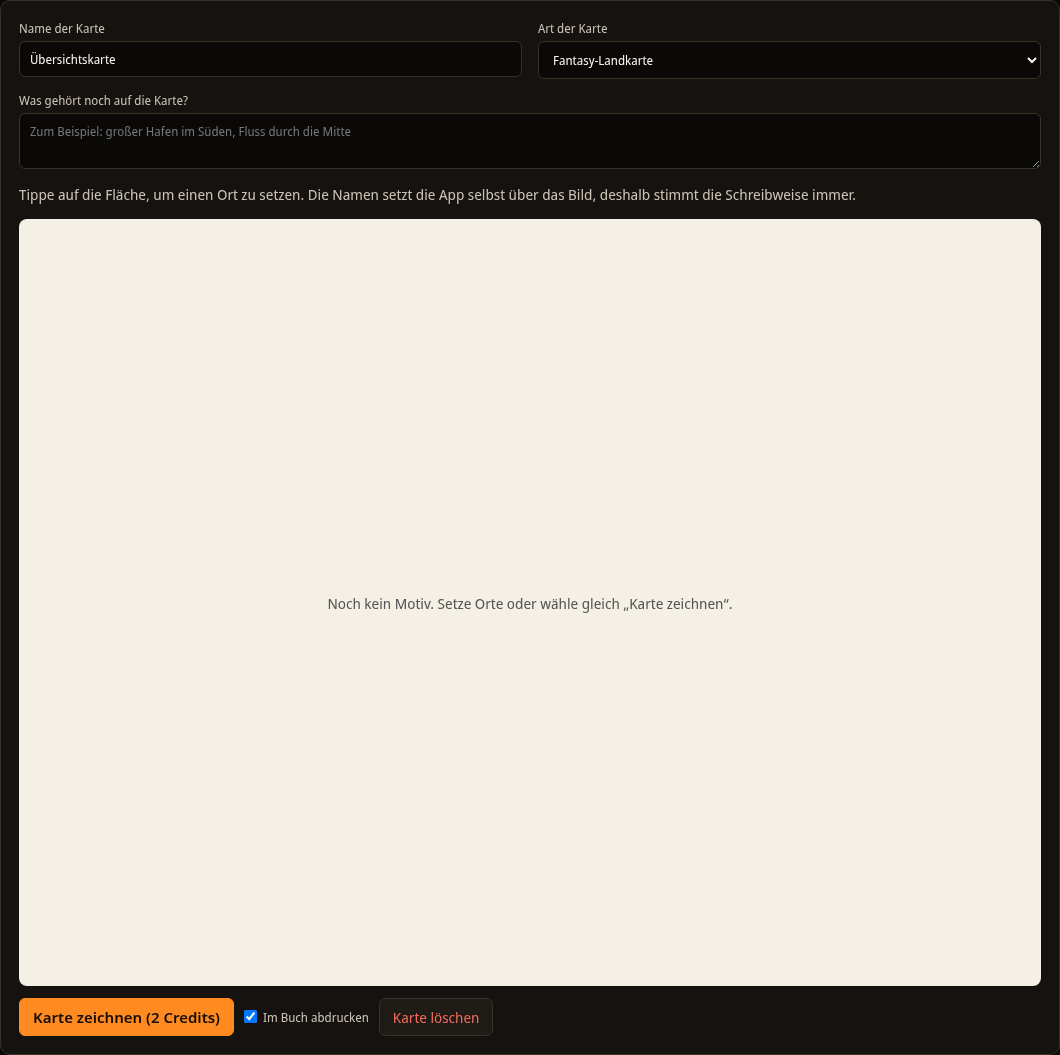
- Select + New map. The map is first called Overview map.
- Enter a name under Name of the map and choose a template under Type of map, for example Industrial town, Island or Building plan.
- Under What else belongs on the map? describe what should be visible, for example: A canal in the middle, a harbour in the south.
- Select the Places tool and click the area to place a location. Write the name of the location in the field What is this place called? and select Place location or press Enter. With Cancel you do not place a location.
- Draw the map yourself (see below) or select Draw map. Then the AI draws the image of the map. It is AI-generated and uses credits. With Draw again you generate a different image.
The entries Type of map and What else belongs on the map? are collapsed under Details for the AI drawing. They only apply to the drawing by the AI.
The Spielbuchschmiede places the names of the locations over the image itself. You remove a placed location by clicking it and confirming the prompt.
With the field Print in the book you decide whether the map appears in the book view and in the printed book. With Delete map you remove the map after a prompt.
Drawing a map yourself
You can draw any map without AI. This costs no credits. The drawing area is below the name of the map.
Tools
- Places: Places a location with a name. Beforehand, choose a symbol under Symbol, for example castle, harbour or lighthouse.
- Freehand: Draw a line with your finger or the mouse.
- Straight line: Draw from one point to the other.
- Path: Tap the points of a path one after another and select Done. A double click also ends the path. The line is smoothed. With Dashed you draw a trail.
- Area: Tap the corners one after another and select Done. The area is filled with the selected shade of grey.
- Label: Tap the spot, enter the text and set the font size and the rotation in degrees. You change a placed label later under Places and labels as a list.
- Eraser: Tap a drawing to remove it.
- Move: Drag the map. With Closer, Further away and Whole map you change the zoom.
Undo and Redo apply to lines, areas and labels. Every change is saved automatically after a short pause. Below the drawing area you see whether everything is saved.
On a phone you draw with one finger. With two fingers you zoom and move the map in every tool.
Layers
The map has five layers: Background, Terrain, Paths, Places and Labels. Under Layers you show or hide each layer and lock it against changes. You draw freehand lines, lines and areas into the layer selected under Draw into. Paths always end up in the Paths layer. A hidden layer does not appear in the book either.
Your own image as a base
Under Your own image and output you upload an image as a base, for example a scanned sketch. JPG, PNG and WebP up to 15 MB are allowed. The image is checked before it appears. Your layers lie on top of it. With Remove base you take it away again.
Compass, scale and output
Under Compass and scale you turn both on and choose the corner. For the scale you set the text yourself, for example 10 km.
In the printed book and in the ebook the drawn map appears in greyscale, with lines in four shades of grey, and with a list of the locations below it. You download it as an SVG file or as a PNG image at 300 dpi under Your own image and output.
With the keyboard and for people who cannot see the drawing
Set the focus on the drawing area. With the arrow keys you move a pointer, in larger steps with Shift held down. The Enter key places a point with the selected tool, Shift and Enter end a line. The Escape key cancels, and with Ctrl and Z you undo the last step. All locations and labels are also listed as text under Places and labels as a list.